How to create a mask from coordinates ?

TL;DR: I need to darken the pixels outside the outline


Hello,

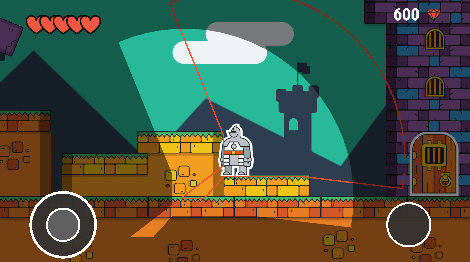
I’m trying to implement a line of sight (or war fog) like in “among us”, I have 70 coordinates of the LoS, in angular order. I represented below in red the array of coordinates with display.newLine().

kn

Now I need to darken every pixel outside the outline (or lighten those inside). It needs to be processed fast as this is processed every frames (or X frames but the less the smoother). I’m not sure how to do it. With the library graphics I need a mask, but how to do this mask from coordinates ? Unless there is another way.

How would you do it ?

Thank you,
Best regards

Hi.

This is kind of an awkward suggestion, since it’s not complete (fails on web, possibly iOS also; just fixed for Android in the most recent build), but you might try a mask canvas.

These are like stock canvases, but the “red” component of your display objects are interpreted as the opacity. So you can render “red” objects (well, probably just white) to make the underlying region visible, or black to hide them.

The original PR has a “hide” example. (A video was mentioned in the old Slack channel; what you see around here motivated this feature.)

My working copy of the docs mention it, but I’ve hedged on submitting with those several platforms still an issue. That said, I am finally starting to use it myself, now that I got around to that first fix. A very rough go at a “show” example, though I have something fancier planned:

local r1 = display.newRect(g, display.contentCenterX, display.contentCenterY, 150, 150)
local r2 = display.newRect(g, r1.x - (r1.width + 3), r1.y, r1.width, r1.height)
local r3 = display.newRect(g, r1.x + (r1.width + 3), r1.y, r1.width, r1.height)

local bounds = g.contentBounds
local w, h = bounds.xMax - bounds.xMin, bounds.yMax - bounds.yMin

local canvas = graphics.newTexture{ type = "maskCanvas", width = w + 6, height = h + 6 }
local mask = graphics.newMask(canvas.filename, canvas.baseDir)

g:setMask(mask)

g.maskX, g.maskY = display.contentCenterX, display.contentCenterY

local rr = display.newRoundedRect(0, 0, 65, 85, 15)

canvas:draw(rr)

timer.performWithDelay(100, function(event)
    rr.x = math.sin(event.time / 750) * 150
    rr.rotation = (event.time / 25) % 360

    canvas:invalidate("cache")
end, 0)

In your case you might try a mostly black background with a big white circle, then slice wedges out of it by covering them with black. Or else build up the visible parts instead. I’m not sure the best way to get the fuzziness along the frontier. Maybe some “shell” objects with gradients?

If the mask idea won’t work, you might also try just covering up the screen. With quad distortion or meshes you could get a pretty tight fit. You’ll again have to puzzle out the alpha on the fringe, though.

In either situation you can also recycle the geometry as your shape changes form.
2 Likes

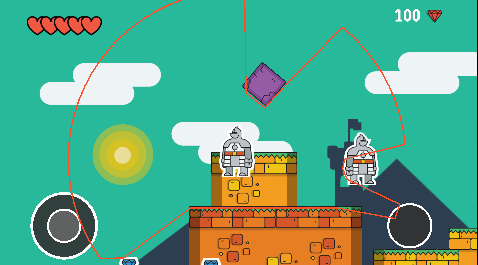
Instead of masking, render the geometry as a solid white and black image and set the blendMode = “multiply” and keep it on top.

White will be clear and black with be black.

1 Like

Here’s an example of how I did it…

5 Likes

And a demo…

Thank you! I did not expect such quality help.

I could not get the mask canvas to work. Ponywolf’s solution was easier to implement for me:

--initialisation
local fogLayer = display.newSnapshot(display.actualContentWidth, display.actualContentHeight)
fogLayer = display.newSnapshot(display.actualContentWidth, display.actualContentHeight)
fogLayer.x, fogLayer.y = display.contentCenterX, display.contentCenterY
fogLayer.blendMode = "multiply"
local black = display.newRect(fogLayer.group, 0, 0, display.actualContentWidth, display.actualContentHeight):setFillColor(0, 0.5)

	--in a loop
	display.remove(clearFog)
	clearFog = display.newPolygon(fogLayer.group, 0, 0, vertices ) --vertices contain all the coordinates of the line of sight
	clearFog.fill = {1} --white
	fogLayer:invalidate() --refresh

Buuut… polygons get centered on their center, they don’t retain their coordinates. Since the center changes depending on the shape (which change when the player move), it gets translated (see image below).

sight

I can translate it back with some ugly maths with the vertical and horizontal raycasts I used to probe the surroundings.

While I’ve used the canvas approach demonstrated by @ponywolf myself, I’ve been waiting for @StarCrunch to finish the mask canvas because, and correct me if I’m wrong here, when you apply a multiply blendMode to a canvas, it makes the draw process heavier and is thus more prone to lagging on older or lower end devices, whereas (and let me know if I’ve understood this correctly, @StarCrunch) when you apply a mask, the masked area is simply not drawn and thus the resource usage is significantly lower.

1 Like

@Boby No worries. As my comments suggested, I feared there might be issues yet. :slight_smile:

@XeduR Both would be render-to-texture calls that need to finish before being used. The “guaranteed” way (later paragraph) is even identical up to that point.

Masks are just textures, with a variant shader being used if one or more is active. The kernel result is simply scaled by the mask value(s): see here.

This precedes the blending step, which always occurs even if just the default; we do still draw, but bits and pieces get blended away, especially when alpha is 0.

In theory mask textures are more lightweight since only the red component is needed. And this is indeed the case if you’re populating them from a file or memory. However, mobile GL does not like the 8-bit format that’s always present, luminance, being used as a render target. Thus these woes. :smiley: The guaranteed fallback is to use an RGBA texture and ignore all but red. But there go any savings. :slight_smile: There is a red format available as an extension, but you need to query the hardware to see if it’s supported.

2 Likes